
Flashing a TADA68 with QMK Firmware
Posted on December 17, 2022
Backstory
I’ve been going through my stack of mechanical keyboards, taking stock of which keyboards work, which cables were still around, and which have been flashed with QMK firmware. For the unaware, QMK Firmware is an open-source firmware and community focused on creating highly configurable layouts for keyboards, mice, and other MIDI devices.
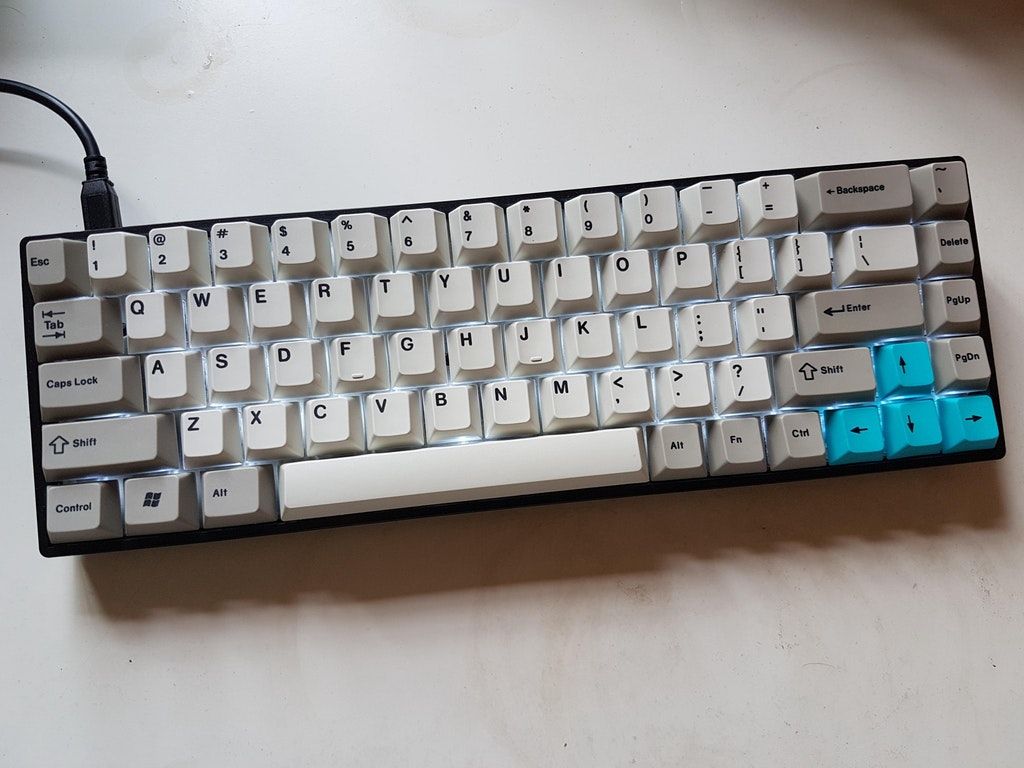
The TADA68 is a 68-key keyboard with full-size arrow keys. Most smaller form-factor keyboards will either cut off the ten-key (called tenkeyless) and leave the arrow keys/Page Up/Dn module, or remove it altogether and rely on alternate keybinds to expose the arrow keys. The TADA68 (marketed as the SABER 68 at Originative Co where I purchased it) forgoes the row of Function keys and shrinks the right side of the Shift key, allowing space to tuck the arrow keys into the main rectangle of the alphanumeric key section.
After buying the TADA68, I ended up using it as my main PC keyboard for a few months, but I quickly grew tired of the additional keypresses to active arrow keys and function keys. I demoted it to “server” keyboard, pulling it out only when necessary. I got really good at mashing the Delete key, I’ll tell you what.
Fast forward to more recently, I plugged the keyboard in and got nothing out of it — no LED backlight, no keypresses, nothing. Same behavior on Mac and Windows, for what it’s worth. Rats. However, when I hit the reset button on the back of the keyboard, it did enter its DFU mode — promising.
Let’s discuss how I ended up fixing it, flashing a QMK firmware onto the keyboard, and enabling access to VIA, a web/app-based keyboard configurator.
The Fix
Compiling
First things first, you need to setup a QMK environment and build a keymap. I ended up using my Mac for this, which just involved running brew qmk/qmk/qmk and waiting a very long time (around 15 minutes). I then ran qmk setup to set up my local QMK directory.
To compile the firmware, I simply ran qmk compile -kb tada68 -km via. Note the flags here: -kb to target the TADA68 keyboard and -km to target the via keymapping. This keymapping has VIA compatability enabled, so we can just reconfigure in-app.
Once the firmware is compiled, we’ll have a .bin file at the root of the QMK directory. This is in contrast to AVR-bootloader keymaps, which generally end with .hex. The TADA68 comes programmed with a LUFA bootloader which is different in… ways. In practice, this means we can use QMK firmware to generate a keymap/firmware, but it should be loaded differently and carefully.
Flashing
In my experience, I needed to send the bin file to my Windows PC, plug it in, and hit the reset button. When the keyboard entered its DFU mode, the board mounts as a mass-storage device in Windows. Simply open the file explorer, delete the existing FLASH.bin, and replace it with my compiled bin. Note that the name should not be FLASH.bin or the board will seemingly not upgrade.
NOTE: do not eject the keyboard. Ejecting the keyboard has a high likelyhood of bricking it. Instead, press the escape key. The keyboard should stop flashing, unmount itself from Windows and immediately be operable.
For Linux and MacOS you should be able to similarly cp the bin, but be extremely careful to not include additional files in the volume — best to ls -la and delete anything additional (like .DS_Store, ghost files, etc) before unmounting the board.
Fin
If everything goes well, you should be able to use the VIA app to configure the keyboard on-the-fly, without needing to recompile or enter DFU mode at all. Very nice!